
 0086-750-5616188
 +86 13392089688
 sales@zhongmei-tech.com
Creating a die casting mold can be a complex process, but it is an essential step in producing high-quality products. A die casting mold is a tool used to form molten metal into a specific shape or design. This process is commonly used in the production of automotive parts, electronics, and household appliances. In this article, we will explore the steps involved in creating a die casting mold.
Step 1: Designing the Mold
The first step in creating a die casting mold is to design the mold. This involves creating a 2D or 3D model of the product that you want to produce. The design should include all the necessary features, such as cavities, gates, and runners. The design should also take into account any undercuts, draft angles, and other factors that might affect the production process.
Step 2: Selecting the Mold Material
The next step in creating a die casting mold is to select the mold material. The mold material needs to be strong enough to withstand the high pressure and temperature of the molten metal. Common materials used for die casting molds include tool steel, aluminum, and copper alloys.
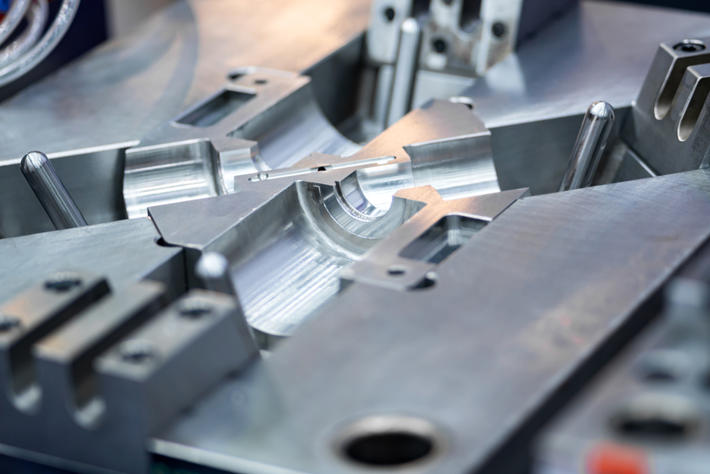
Step 3: Creating the Mold
Once the design and material selection are complete, it is time to create the mold. The mold is typically created using CNC machining or other precision manufacturing techniques. The mold is created in two halves, with each half containing the cavities and other features needed to produce the product.
Step 4: Polishing the Mold
After the mold is created, it is important to polish it to ensure a smooth surface finish. This helps to prevent defects and imperfections in the finished product. The polishing process may involve using various abrasives and polishing compounds to achieve the desired finish.
Step 5: Testing the Mold
Once the mold is complete, it is important to test it to ensure that it is working correctly. This involves running a trial production run using a small amount of molten metal. The finished product is then inspected for any defects or imperfections. Any issues that are identified are addressed before moving on to full-scale production.

Step 6: Full-Scale Production
Once the mold has passed the testing phase, it is ready for full-scale production. This involves filling the mold with molten metal and allowing it to cool and solidify. The finished product is then removed from the mold and inspected for any defects or imperfections. Any issues that are identified are addressed before the product is shipped to customers.
Creating a die casting mold is a complex process that requires careful planning and attention to detail. By following these steps, you can create a high-quality mold that will produce consistent, high-quality products.


-

- Thixomolding magnesium parts & components mobile phone middle board
-

- Ultralight suspension fork for MTB
-

- Magnesium Aluminum Alloy Children Bike 3-8 Years Old Cheap Hot Sale 14 Inch Children Bicycle FOREVER Wholesale 2022
-

- Mangensium alloy die-casting Thixomolding metal parts
-

- Magnesium alloy rigid fork for bicycle -customized die casting metal parts
-

- Magnesium alloy die-casting Auto parts Front bumper Anti-collision beam